

Jupyter Notebooks provide an interactive environment for writing, running, and visualizing Python code directly in your browser. On SeaWulf, Jupyter can be launched through the Open OnDemand (OOD) web portal, giving you easy access to the cluster without needing SSH. It’s ideal for data analysis, visualization, and developing reproducible workflows.
Getting Started
- Open the SeaWulf Open OnDemand portal: https://sn-ood.seawulf.stonybrook.edu/
- Log in using your NetID and DUO authentication.
- Launch Jupyter:
- Click the Jupyter Notebook icon on the main dashboard
- OR navigate to Interactive Apps → Jupyter Notebook
Session Configuration
- Queue: Choose the appropriate queue for your workload (e.g.,
short-40core-shared). - Number of hours: Adjust according to how long you plan to run the session.
- Number of cores: Set based on the complexity of your notebook; 1–4 is typically sufficient.
- Memory: Amount of memory required. Ensure you specify 'G' for gigabytes.
- Email Notification: Optional; notifies your Stony Brook email when the session starts.
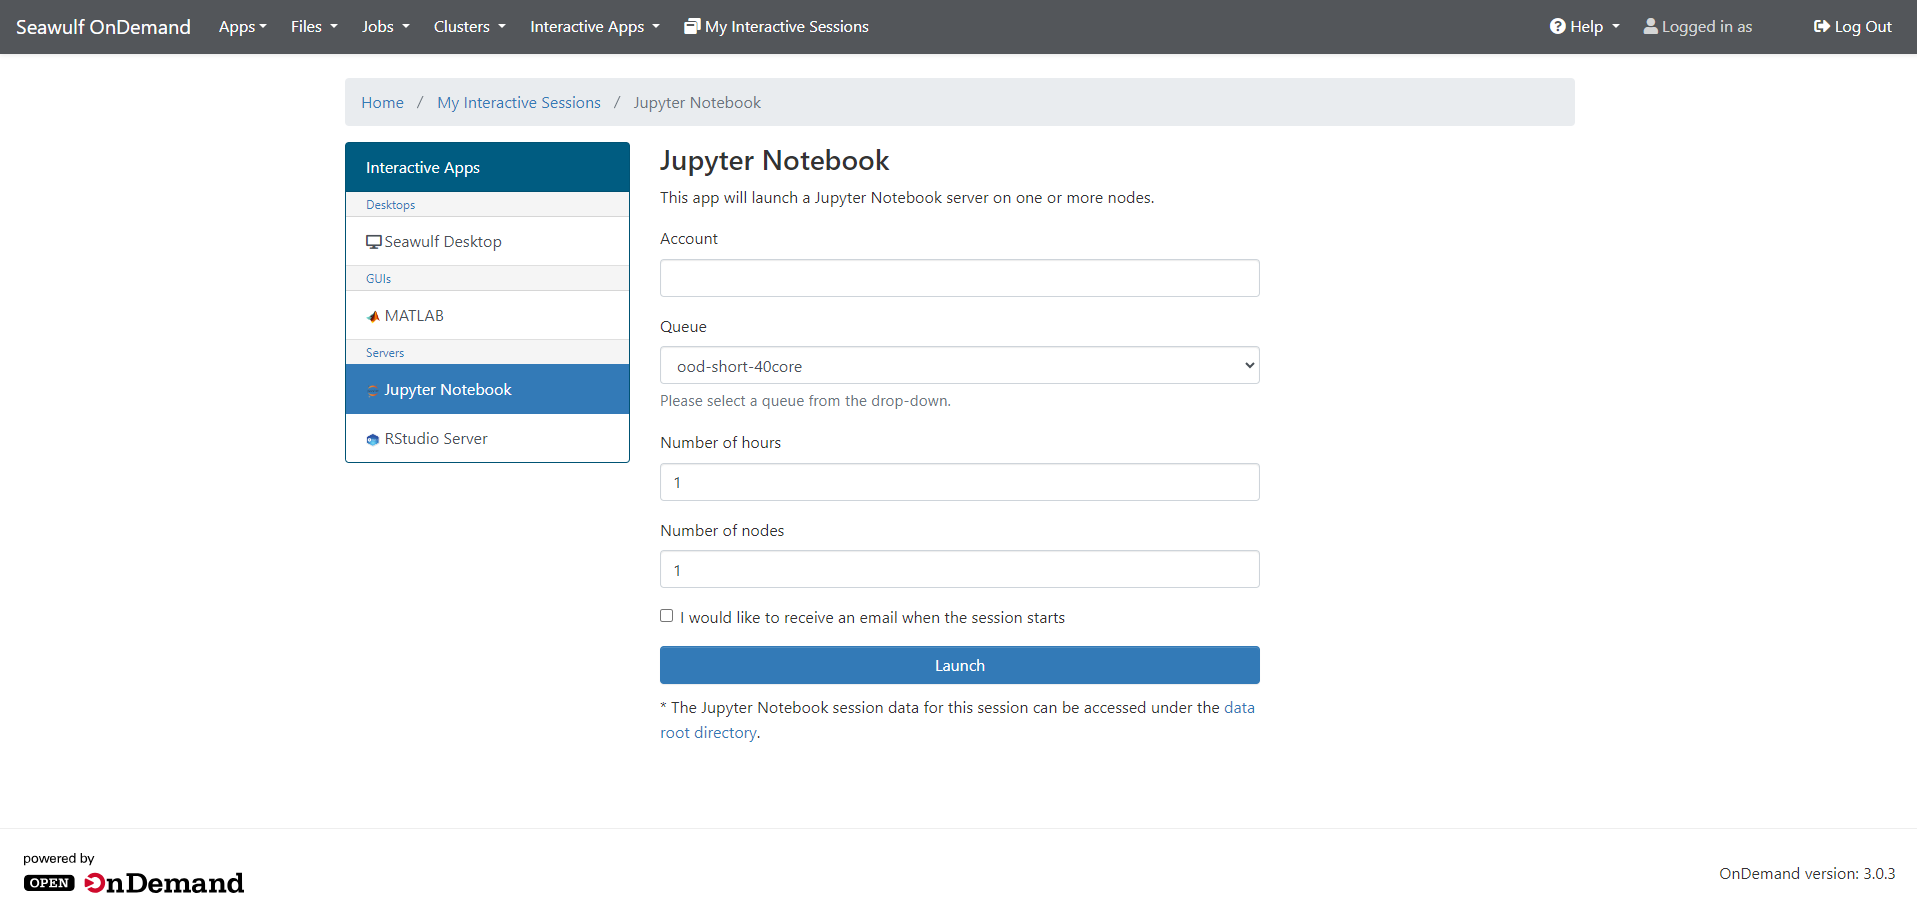
Click Launch to begin. Your session will show as Queued → Starting → Running. Once it reaches Running, a Connect to Jupyter button will appear.
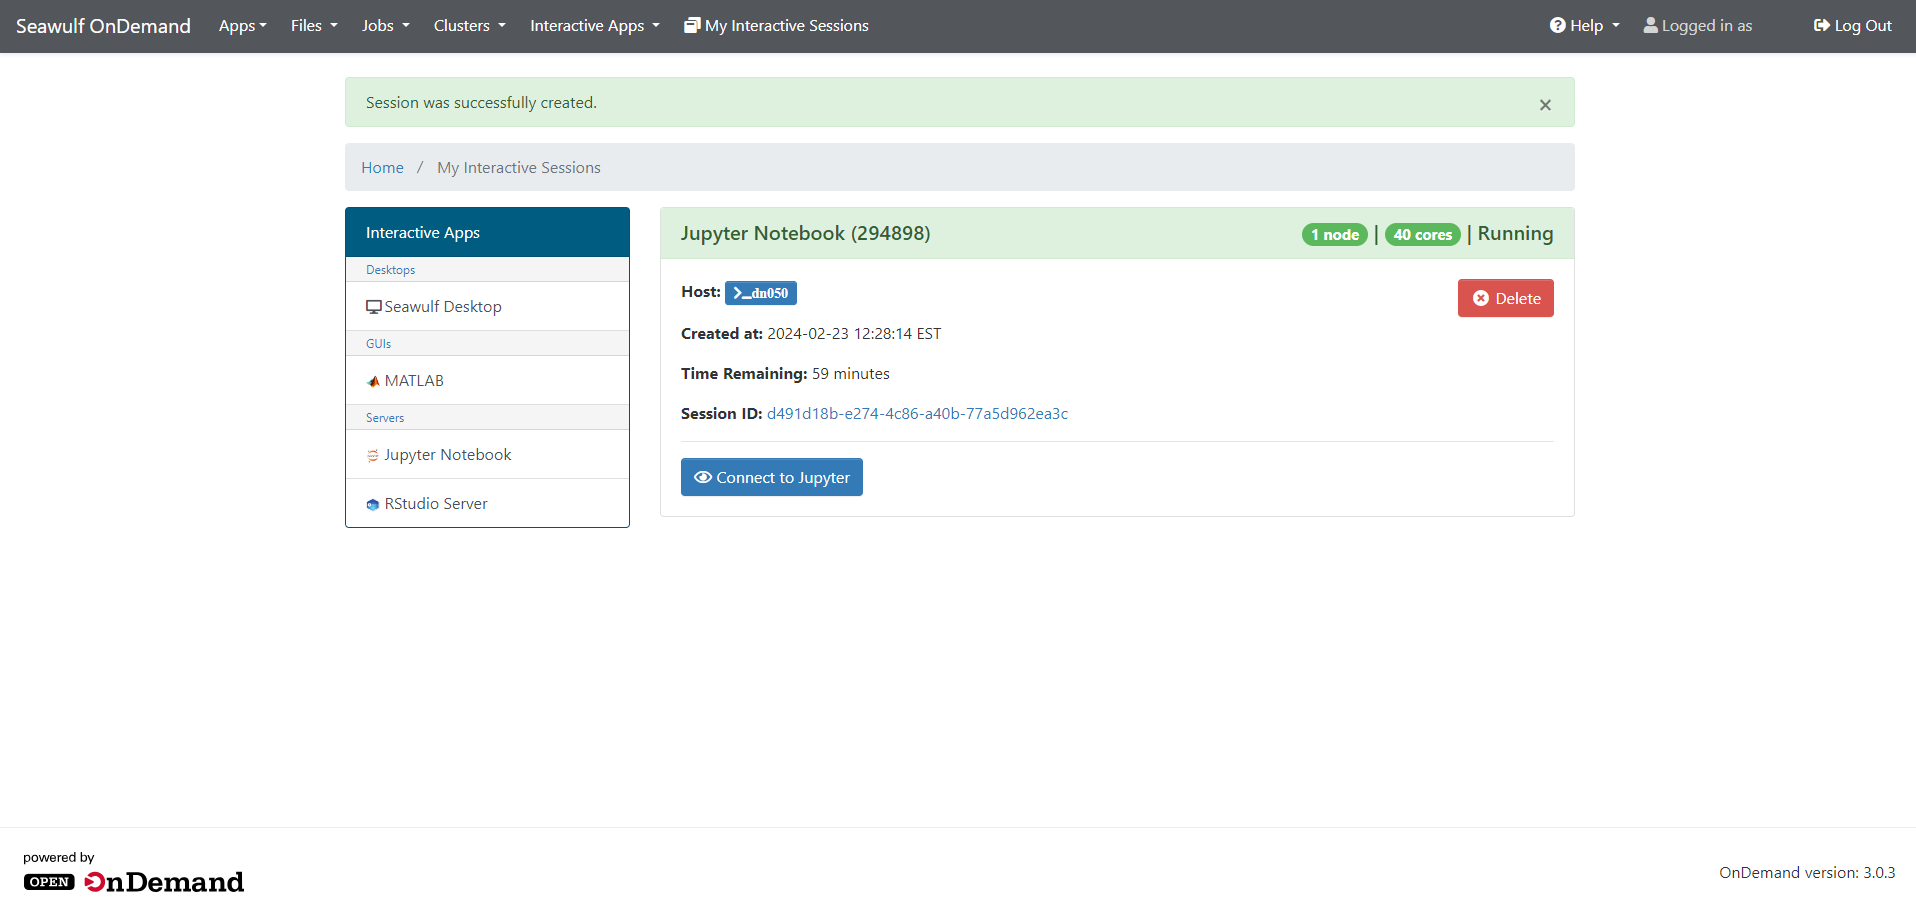
Click Connect to Jupyter to open the notebook interface.
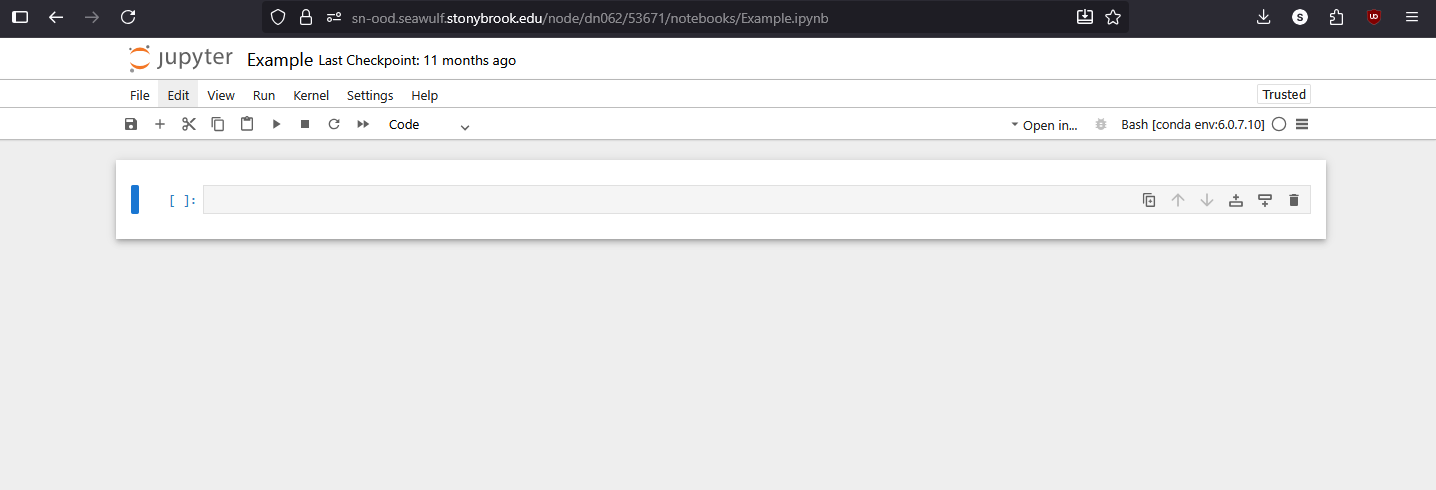
Using Jupyter Notebook
Once connected, you’ll see the familiar Jupyter interface in your browser. You can create new notebooks, open existing ones, and run code directly on the SeaWulf compute node allocated to your session.
File Access
- Your home directory (
/gpfs/home/NetID) is available by default. - To access other directories (e.g., scratch or project), create a symbolic link:
ln -s /gpfs/scratch/NetID /gpfs/home/NetID
Replace NetID with your actual username. This will create a shortcut in your home directory for easy access from within Jupyter.
Best Practices
- Use Conda or virtual environments for reproducible workflows.
- Monitor resource usage if running long computations.
- Close idle notebooks and delete sessions when finished to free up cluster resources.